Skip to content

How to find new hobbies and foster creativity

In the ever-lasting quest for a balanced life, making space for hobbies, passions and creativity can be a pivotal key in finding our equilibrium. Our hobbies are an important way to express our creativity and to explore who we are. They can also bring challenges, a sense of accomplishment, and an opportunity to connect with others. In fact, creativity is central to human activity and thought. It has been the driving force for all innovation throughout human history.

But with the energetic drain of our daily responsibilities, it is easy to neglect space for creativity and hobbies. We need this space in order to thrive. If we are looking to change our lives and find joy in the moments between the monotonous day-to-day responsibilities, putting effort into a new hobby might be just the thing for you. As the saying goes, “You are never too old and it is never too late.”

Start by following your feelings

It can be hard to find a new hobby if you have not already invested years into one, especially as an adult. Where can one start? One of the first steps into exploring new hobbies and passions is to follow your feelings! Listen to yourself, your reactions to activities you are already doing, and bring awareness to your feelings during your experiences. Try asking yourself these questions as you explore:

  • Where do you find joy?
  • Where do you find peace?
  • What do you value?
  • What are you interested in?
  • What are some activities that you currently do that allow you to seem to lose track of time?
  • Take some time to reflect (maybe even start a journal) and ask yourself these questions. As you take the time to answer these questions, take this as an opportunity to explore and get to know yourself better!

Revisit your inner-child

It’s been said that the child-versions of ourselves are the most authentic version of ourselves. As you dive deeper into your self-exploration, ask yourself what you enjoyed as a child. Revisit these experiences and see how you feel. Were you always playing outside? Try exploring a hobby that will take you out in nature. Did you enjoy being active and playing sports? Try joining a team sport. Were books in quiet corners more of your thing? You might find joy in a book club or with a writing group. As you take this journey to your hobbies, you may find a path leading you to your most authentic self.

Create a space for creativity

Once you’ve found a hobby you are interested in, create space. Literally and figuratively. Set a dedicated time in your week to immerse yourself completely in this your hobby. Most of us have been taught that when it comes to time, productivity is what matters most. As a result, we’ve structured our lives around work rather than play. But with a little thought, you should be able to find more time in your schedule to do the things you love.

If you are taking up a new hobby that can be done from your home, set up a dedicated space. A workshop, music room, art space, etc… You’ll find that having this space already set up and committed to your craft will help you stay consistent in your practice. Think of this like a meditation. You won’t be able to experience the full joy and wonder of your craft unless you stay committed to the practice.

Patience and Process, Not Productivity

Your hobby is not about producing or presenting something for others. This is your craft. Your practice.  Allow yourself to get lost in the highs and lows of immersing yourself in a practice, without the attachment to leave something behind. Try to put aside the strange pressure we feel to “prove” ourselves and simply do to do. Create to create, then, watch yourself grow along the process.

Looking for somewhere to start?

See if the following free, creative classes with The Whole U interest you. You may strike a new passion! Follow along on YouTube.

History of Japanese Origami Workshop with Guided Creation

Origami is the art of paper folding and a traditional Japanese culture. This workshop will introduce the background of the origami culture and also give guided instruction in creating origami. In the first half, the presenters will talk about several topics: the history of origami, its symbolism of peace, applications in science and industry, and other benefits. In the second half, the presenters will show some examples and give guided instructions for those wishing to try it themselves.

Art Series with Miha Sarani 

Do you have an appreciation for the arts? This virtual workshop series with Mihai Sarani explores:

Learn more about various forms of art and have fun trying something new with UW alum Miha Sarani, visual artist, art historian, and art educator. These workshops are appropriate for all ages.

Intuitive Painting Workshop with Studio Life 

Join Studio Life and instructor Lotte Goede for a time of spontaneous painting by tapping into our creative intuition. No experience necessary! You will quiet the minds, connect within and paint from intuition. This workshop is about creative exploration and freedom – a process of letting go and joyful discovery in a non-judgmental space.

There are no mistakes here. You’ll be transforming your canvas with every layer, which in turn will inspire your next step.

Watercolor Painting Class with Sarah Simon of TheMintGardener 

Join Studio Life and watercolor expert Sarah Simon of The Mint Gardener for a watercolor painting workshop. During this 90-minute workshop, Sarah will share how she has been able to expand her creativity through watercolor painting and starting her business The Mint Gardener. Sarah will then instruct a leaves and florals watercolor painting workshop.

All levels are welcome!


Wherever you are in your creative journey, The Whole U is here to help you stay on track with your goals and connect you to exciting, new opportunities. Share with us what forms of creativity you love or have found in the last year in the comments below!

Smartphone photography 101: A guide to stunning shots

“The best camera is the one that’s with you.” – Chase Jarvis

In today’s fast-paced world, our smartphones are more than just communication devices. They’re powerful cameras that we carry with us every day. Whether you’re capturing moments on the go or working on your creative portfolio, your smartphone is a fantastic tool for photography. In this blog, I’ll take you through the essentials of smartphone photography, with tips that will help you elevate your skills from casual snaps to professional-quality images.

About Me
Hi, I’m Sebastian Ky, a multimedia specialist with a passion for photography and digital storytelling. I’ve spent years exploring the art of visual communication, and today, I’m excited to share my knowledge of smartphone photography with you. Let’s dive in!

Understanding your smartphone camera

The first step to great smartphone photography is to familiarize yourself with your camera’s settings. Here are the three key settings you need to master:

  • Resolution: High resolution ensures your photos are crisp and detailed. Always set your camera to the highest possible resolution for the best results.
  • HDR (High Dynamic Range): This feature enhances your images by balancing the light and dark areas. Use it in scenes with high contrast, like a sunset or a backlit subject.
  • Gridlines: Enable gridlines to help compose your shot using the Rule of Thirds, a powerful composition tool that we’ll explore next.

Example: Imagine you’re on vacation, capturing a beautiful landscape. Turn on HDR to ensure the sky doesn’t get washed out, and use gridlines to position the horizon perfectly, enhancing the balance and aesthetic appeal of your shot.

Composition techniques: the art of framing your shot

“A good photograph is knowing where to stand.” – Ansel Adams

Composition is the backbone of any great photo. It’s about how you arrange elements in your frame to create balance and focus. Here are some essential techniques to try:

  • Rule of Thirds: Imagine your screen is divided into nine equal sections. Place your subject along these lines or their intersections for a balanced, dynamic shot.
  • Leading Lines: Use natural lines in your environment, like roads, rivers, or architectural features, to guide the viewer’s eye toward your subject.
  • Symmetry and Balance: Symmetry can create striking images, while balancing elements on either side of your frame ensures harmony.

Example: While photographing a street scene, use leading lines from a pathway or a row of buildings to naturally draw attention to your main subject, whether it’s a person or a distant landmark.

Lighting fundamentals: mastering light for stunning photos

“Where light and shadow fall on your subject—that is the essence of expression and art.” – Scott Bourne

Lighting can make or break a photo. Natural light is often the most flattering, but learning to work with artificial light is also important. Here’s how to handle both:

  • Natural Light: Use the golden hour (the hour after sunrise or before sunset) for soft, warm light. The midday sun can be harsh, so look for shade or shoot with the sun behind your subject.
  • Artificial Light: Experiment with light sources like lamps or LED lights. Play with angles and intensity to create the mood you want.
  • Exposure: Adjust your camera’s exposure settings to control how light or dark your photo is. Many phones allow you to tap on the screen to manually adjust the exposure for different parts of the scene.

Example: For a portrait shot outdoors, position your subject so the light falls softly on their face, avoiding direct overhead sunlight. Indoors, use a soft lamp to add warmth and eliminate harsh shadows.

Focus and depth of field: highlighting your subject

“To me, photography is an art of observation. It’s about finding something interesting in an ordinary place.” – Elliott Erwitt

Focus and depth of field allow you to control which parts of your image are sharp and which are blurred, helping you highlight your subject:

  • Auto-Focus: Let your smartphone automatically detect the subject and adjust focus accordingly.
  • Tap to Focus: In complex scenes, tap on your subject to ensure the camera focuses on the right part of the image.
  • Portrait Mode: This mode creates a shallow depth of field effect, blurring the background and keeping your subject in sharp focus—perfect for portraits or food photography.

Example: When taking a portrait, use Portrait Mode to keep the person’s face sharp while softly blurring the background for a professional, polished look.

Editing essentials: enhancing your photos post-shoot

“You don’t take a photograph, you make it.” – Ansel Adams

Once you’ve taken your shot, editing can elevate it even further. Here are some basic adjustments to improve your photos:

  1. Adjust Exposure, Contrast, and Color Balance: Small tweaks can make your photo brighter, more vibrant, or more dramatic.
  2. Crop and Straighten: Remove distractions and ensure your photo’s horizon is level for a cleaner composition.
  3. Filters and Presets: Play around with filters to change the overall look and feel of your photo. Apps like VSCO or Lightroom offer a variety of presets that can give your images a unique style.
  4. Exporting: Export your photos in the correct format for their intended use—JPEG for everyday use, PNG for high-quality images on the web.

Example: After capturing a street market scene, brighten the exposure slightly, adjust the color to make the produce pop, and crop out unnecessary elements to draw attention to the vibrant market stalls.

Practical tips and tools: taking your photography further

To conclude, here are some practical tips for honing your smartphone photography skills:

  • Clean Your Lens: This simple step can drastically improve image quality.
  • Steady Your Shot: Use both hands or a tripod to reduce blurriness from hand movement.
  • Experiment: Don’t be afraid to try new angles, lighting setups, and editing styles. Photography is about creativity and discovery.

Download the Smartphone Photography 101 slides!

With these tips in hand, you’re well on your way to capturing stunning images with your smartphone. Whether you’re photographing family gatherings, breathtaking landscapes, or everyday moments, remember that great photography is all about seeing the world in new ways. Happy shooting!

Distinguishing fact from fiction in the media

Many sources compete for attention online and in our social media feeds, including partisan blogs and bogus sites posting as legitimate news organizations. It can be tough to know what to trust. Follow these five steps from the News Literacy Project to cut through the noise and learn how to evaluate sources for signs of credibility — as well as red flags that signal a source should be avoided.

5 step assessment

1. Do a quick search

Conducting a simple search for information about a news source is a key first step in evaluating its credibility. It’s important to look beyond social media. Go to a search engine and plug in the name of the website or publication. Do other legitimate resources, such as standards-based news organizations or fact-checking websites describe this publication as unreliable? Satirical? Is it a state-run propaganda “news” site? If so, there’s no need to spend more time vetting. Look elsewhere for reliable information.

Tip: Wikipedia can be a good place to start and lead you to relevant source links. Just keep in mind that some credible local newsrooms may not have an entry there. You can also see if a source has been vetted for inclusion on news aggregators, such as Google News, Apple News and SmartNews.

2. Look for standards

Reputable news organizations aspire to ethical guidelines and standards, including fairness, accuracy and independence. These standards should be available publicly — often in the form of editorial policies or a code of ethics. Look for evidence that a source follows such standards. If someone is mentioned in a critical story, for instance, did the journalist give that person a chance to comment?

Note: Some professional journalism standards are commonly shared across the industry, such as the Society of Professional Journalists Code of Ethics. Other policies are unique to different newsrooms.

3. Check for transparency

Quality news sources should be transparent, not only about their reporting practices (see step 2), but also about their ownership and funding. Is it clear who owns and runs this website or publication? Is advertising labeled responsibly? Can you tell who is writing and producing content? Is there a way to contact newsroom editors and reporters?

Remember: “About” pages can provide some of these details, but they can also be misleading and omit important information (about a source’s ownership or lack of independence, for example). Don’t be fooled by a sleek web design or trust the “About” page on an unfamiliar site without further verification. If something seems suspicious, check it out.

4. Examine how errors are handled

Credible news sources are accountable for mistakes and correct them. Do you see evidence that this source corrects or clarifies errors?

5. Assess news coverage

An important step in vetting sources is taking time to read and assess several news articles. Do you see original reporting? Do they provide straight news reports or just commentary and opinion? Are there grammatical and/or spelling errors? How do news articles from this source compare to coverage from other standards-based newsrooms on this same topic? Many people have strong opinions about news sources without evaluating them firsthand.

Tip: Take note of the bylines (names) on news coverage. These bylines can help you confirm that this coverage was written or produced by professional journalists. Bylines are also a sign of transparency and accountability.

Beware of these trust busters

If you spot any of these problems, look elsewhere for credible news.

  • False or untrue content – Publishing a demonstrably false claim without correcting it.
  • Clickbait tactics – “Baiting” you with sensationalized language, including misleading or exaggerated headlines or headlines that are purposely vague to drive clicks.
  • Lack of balance – Consistently focusing on one angle or side of a legitimate debate or controversy, while ignoring or distorting other perspectives.
  • Manipulated images or videos – Misrepresenting or altering visuals or generating them using AI. You can do a reverse image search using Google, TinEye or Yandex (among other tools).
  • State-run or state-sponsored propaganda – Using government-controlled news organizations to further national agendas and improve public image.
  • Dangerous, offensive and malicious content – Could include discriminatory language, unverified pseudoscience, content that promotes violence or coverage that, as the SPJ Code of Ethics states, “panders to lurid curiosity.”

This guide was created by the News Literacy Project in partnership with SmartNews.

UW battles misinformation and disinformation

The University of Washington has world-renowned experts and resources to combat misinformation and disinformation. Much of this knowledge is consolidated in the UW Center for an Informed Public. To learn more, check out:

Calling Bullsh*t – this celebrated book and course, created by UW Professors Carl Bergstrom and Jevin West of the UW Center for an Informed Public, offers a wealth of useful advice, tools and resources to combat misinformation and disinformation.

MisinfoDay – the Center for an Informed Public’s annual media literacy educational event brings together high school students, teachers and librarians to learn how to navigate complex information environments and make informed decisions about what to believe online. The site offers an informative resource library.

Confronting Fake News and Misinformation – the UW has aggregated resources to help students develop critical thinking skills that are the cornerstone of informed and responsible civic engagement.

Beyond the UW, here is a list of many other organizations fighting fake news.

Support

You can support the UW Center for an Informed Public. Or, please consider making a one-time gift or setting up a monthly payroll deduction through the UWCFD to support one of our member organizations working to fight misinformation and dedicated to fair, truthful and accurate news reporting:

Internews Network – trains journalists, tackles disinformation and helps media outlets become financially sustainable so that everyone has trustworthy information to make informed decisions and hold power to account (Charity Code: 1479810).

States Newsroom – The nation’s largest state-focused nonprofit news organization, with reporting from every capital (Charity Code: 2006548).

National Public Radio – an independent, nonprofit media organization that cultivates an informed public, fostering a deeper understanding and appreciation of events, ideas, and cultures (Charity Code: 0519253).

KUOW Public Radio – an independent, nonprofit news organization that produces award-winning journalism, innovative podcasts, engaging community events, and more (Charity Code: 0315756).

Cascade PBS – a community-licensed and supported public television station and media organization with a mission of inspiring a smarter world through high-quality, accurate, local, relevant media—on air, online and in-person (Charity Code: 0315693).

Northwest Public Broadcasting – a regional radio network dedicated to enriching Northwest communities by sharing and creating distinctive programs which engage, enlighten and entertain (Charity Code: 0330094).

Edible berries of the Pacific Northwest

Note: This article is a reflection of the author’s first-hand experiences with berries of the Pacific Northwest and is intended as a starting point to get educated and not as a definitive guide. Unfortunately, we are not able to identify berries on a case-by-case basis at this time.

This summer, whether you’re on an intensive hike or just going for a walk down the street, you are bound to come across some berry bushes. Here in the Pacific Northwest, we are gifted with mild temperatures, rich soil, and lots of rain, which gives our native plant species a great environment to take root and flourish.

Growing up, I experienced berry bushes’ beauty and abundance first-hand at summer camp. There, we learned about nature, the woods, plants, animals, and conservation efforts and the camp instructor was always prepared to stop our group to point out a bunch of berries. There is nothing better in summer than picking some right from the bush. However, with so many varieties present in the Pacific Northwest, it can be difficult to know where to start, or which are okay to eat.

While foraging with caution is always recommended, we’ve compiled some basic guidelines for identification, best uses, and taste of some of the most common berries you might find the next time you talk a walk on the wild side.

Common edible berries of the Northwest

Blackberries

Scientific Name: Rubus

Origins: This berry is known all over the world, but is very popular in the Pacific Northwest. The berry and plant are commonly used by Native Americans in the Pacific Northwest as a food and medicinal plant.

Color and shape: Black when mature; red and green when they are still growing. They are bumpy in shape (Beware of thorns on the plant).

Taste: Very sweet when ripe; sour when unripe.

Where to Find Them: These berries can be found in backyards and along roadsides across the country. Plants grows well in the sun and large patches are known as brambles. Highly invasive Himalayan and evergreen blackberry varieties are non-native European species that are highly invasive and difficult to control. Originally introduced for fruit production, they are now naturalized and widespread throughout the Pacific Northwest and are easy to spot by their large, vigorous, thicket-forming growth and sharp spines covering the stems.

Peak Season: July through September.

Great in: Jams, jellies, pies, and cobblers, or just eaten as-is.

Salmonberries

Scientific Name: Rubus spectabilis

Origins: Native to the West coast of North America, salmonberries are traditionally eaten with salmon or salmon roe by Native Americans in the Pacific Northwest.

Color and shape: Mature berries are most commonly a yellow-orange. Younger berries may appear red. Berries are bumpy in shape, much like blackberries (Beware of the thorns on the plant).

Taste: Mildly sweet to neutral taste.

Where to Find Them: The plant prefers moist, shady areas with a bit of sun and can commonly be found near creeks.

Peak Season: Salmonberries are best from early May to late July.

Great when: Eaten as-is.

Huckleberries

Evergreen variety

Scientific Name: Vaccinium ovatum

Origins: Native Americans in the Pacific Northwest are fond of this berry, often traveling long distances to gather them—eating them fresh or drying them into cakes.

Color and Shape: Mostly black but can appear bluish or purple, Huckleberries are smooth and round.

Taste: Sweet to tart taste.

Where to Find Them: This shrub thrives mostly in the shade with some sun. It is common to find plants sprouting out of or near downed trees or stumps.

Peak Season: The plant is an evergreen shrub, but produces berries in the summer.

Great in: Jams, pies, cobblers, ice creams, or eaten as-is.

Red variety

Scientific Name: Vaccinium parvifolium

Origins: Native Americans in the Pacific Northwest eat this berry throughout the year—both fresh and dried, often using it as fish bait due to its resemblance to a salmon egg.

Color and shape: Pinkish red berries. They are smooth and round.

Taste: Sweet to tart taste.

Where to Find Them: Similar to its relative the Evergreen Huckleberry, the Red Huckleberry can be found in moist, shady areas, often growing out of or near downed tree trunks or stumps.

Peak Season: Summer

Great In: Jams, jelly, pie, cobbler. Or eaten as-is.

Oregon Grape

Scientific Name: Mahonia nervosa

Origin: Native Americans in the Pacific Northwest have long eaten this berry, but often mix it with sweeter berries to better its flavor. These berries are also used for dye and medicinal purposes.

Color and shape: Blue/purple. They look and taste nothing like a grape. They are small, smooth, round, or slightly egg-shaped.

Taste: Slightly sour.

Where to Find Them: There are two types of Oregon Grape: the Tall Oregon Grape and the Low Oregon Grape. The Low can be found in relatively moist, open forests while the Tall can handle both dry open areas and moist shady areas. Native to western North America, it can be found from the Rocky Mountains all the way to the Pacific Coast.

Peak Season: The plant blooms in spring and produces berries in the summer.

Great in: Jelly or eaten as-is.

Caution: Consume in moderation, as these berries can be toxic in excess.

Salal Berries

Scientific Name: Gaultheria shallon

Origin: Eaten by Native Americans of the Pacific Northwest in combination with Oregon Grapes to sweeten them, Salal berries are often dried into cakes.

Color and shape: Dark blue, these berries are smooth and oval shaped.

Taste: Sweet with a mealy texture.

Where to Find Them: Salal plants grow anywhere in a variety of climates. They can do well in moist and shady areas and also in partial sun.

Peak Season: August through September.

Great In: Jam and pies.

Thimbleberry

Scientific Name: Rubus parviflorus

Origins: This plant ranges from Alaska down the west coast to north Mexico.

Color and Shape: Bright red when ripe, these berries resemble raspberries. The berries’ hollow shape gives them a resemblance to a thimble, although this plant has no prickles like its cousins. Expect a tart flavor when eaten.

Where to Find Them: Found along roadsides and the edges of clearings, it can be one of the first plants to grow after a fire or clear cut. They prefer shady, moist, and cool areas.

Peak Season: July through August

Great In: Eaten as-is, or in jam.

Black Raspberries

Scientific Name: Rubus leucodermis

Origins: Also known as the Whitebark Raspberry, this plant’s range stretches from the Pacific Northwest to north Mexico.

Color and Shape: Similar in shape to a raspberry, unripe berries range in color from red to dark purple, growing darker as they ripen. A way to tell these berries apart from a regular blackberry is the core: blackberries have a white core, whereas a black raspberry is hollow in the middle like a regular raspberry. Black raspberries tend to be more “fuzzy” like raspberries instead of more smooth like blackberries.

Where to Find Them: Usually found in areas of sun to light shade in fields or wooded hills.

Peak Season: June to September

Great In: Eaten as-is.

Common Toxic Berries of the Northwest

Holly Berries

Scientific Name: Ilex aquifolium

Origin: There are many varieties of Holly plant across the world, but one that’s commonly found in the Pacific Northwest is English Holly. Originally native to the British Isles (often used as a decorative shrub in gardens and popular during the Christmas holidays), this evergreen plant is an aggressively invasive species to the West Coast and is found in abundance across Washington stretching all the way to California.

Color and Shape: Bright red, round berries. The leaves are identifiably spiny.

Where to Find Them: This plant thrives in both sun and shade, growing into large thickets choking out native plant life.

Peak Season: The plant is evergreen and the berries ripen in winter.

Caution: Toxic to both humans and pets.

Can Be Confused With: Oregon grape as their leaves are similar.

Bittersweet Nightshade

Scientific Name: Solanum dulcamara

Origin: Originally from Europe.

Color and Shape: Small, smooth, oval-shaped red berries, but can also be shades of green and orange when ripening.

Where to Find Them: Found mostly on the edge of empty fields, by roadsides, in backyards, and by streams due to its love of moist, shady areas.

Peak Season: These berries ripen in autumn.

Caution: Toxic to both humans and animals.

Can Be Confused With: Red huckleberry due to similar color and size.

Red Baneberry

Scientific Name: Actaea rubra

Origin: This plant is native to North America and can be found across the Pacific Northwest region.

Color and Shape: Shiny, red, and round, these berries often have a small black spot at the bottom of berry—a surefire sign to not consume it!

Where to Find Them: This plant is found most commonly in moist, shady areas, but can be found in dry slopes.

Peak Season: Berries ripen in July.

Caution: The plant is poisonous, but its berries are most toxic. Toxic to humans, it is also avoided by other types of wildlife.

Can Be Confused With: Red Huckleberry- similar in shape, color, and size.

As you enjoy the summer months here in the Pacific Northwest, be on the lookout for these berries in your outdoor adventures. Always remember, if you are not sure what the berry is, best to look it up first or avoid it altogether. Happy hiking!

The Whole U’s top 10 hikes in Washington state

No plans for the weekend? Why not take a hike? No, I don’t mean that sarcastically. There are tons of beautiful hikes in Washington! I’ve compiled a list of hikes, in order of difficulty, located on the west side of the state.

Not an avid hiker? That’s okay! Start out with the hikes at the beginning and challenge yourself to reach the more difficult routes over time. It’s all about setting goals!

(Photo: Jessie Hay, Flickr)

Wildside Trail

Location: Issaquah Alps (Cougar Mountain)
Distance: 4.2 miles
Gain: 489 ft.
Highest Point: 1122 ft.
Difficulty: Easy
Notes: This route is great for running if you prefer to do so. The scenery is absolutely breathtaking, but park visitors must stay on the official trails due to hazards from historical mining activities in this area.

Twin Falls State Park (Photo: Michael Matti, Flickr)

Twin Falls

Location: Snoqualmie Pass/North Bend
Distance: 2.0 miles
Gain: 500 ft.
Highest Point: 1000 ft.
Difficulty: Easy
Notes: This hike is all about the views! The route follows the Snoqualmie River and Cascade Mountain forests. And of course, there are fabulous views of Twin Falls.

Rattlesnake Ledge, Washington (Photo: Zach Taiji, Flickr)

Rattlesnake Ledge

Distance: 4.0 miles
Gain: 1160 ft.
Highest Point: 2078 ft.
Difficulty: Easy
Notes: This particular hike is located on the Eastern edge of Rattlesnake Ridge. Views are absolutely unbelievable from the Cedar River watershed to Chester Morse Lake. Be sure to check out the monolithic rock!

Lime Kiln Trail

Location: Granite Falls/North Cascades
Distance: 7.0 miles (half day)
Gain: 625 ft.
Highest Point: 750 ft.
Difficulty: Easy
Notes: This one is easy on the knees, as it is mostly a level path, despite a decline through the forest. The best thing is that you get peekaboo views of the river!

Parasailing at Poo Poo Point (Photo: msteins, Flickr)

Poo Poo Point

Location: Issaquah/Tiger Summit
Distance: 7.4 miles
Gain: 1858 ft.
Highest Point: 2021 ft.
Difficulty: Moderate
Notes: You get mixed scenery with this one: wildflowers, bushes, and creeks. The best part is that hang gliders and paragliders take off here from spring to fall!

Atop Bandera Mountain (Photo: Nikky, Flickr)

Bandera Mountain

Location: Snoqualmie Pass
Distance: 8.0 miles (half day
Gain: 3400 ft.
Highest Point: 5240 ft.
Difficulty: Difficult
Notes: This one can be a little tough right at the end, but the view makes it 100% worth the challenge! Who doesn’t want gorgeous panoramic views of the Cascade Mountains? Also, be sure to bring extra water and some bug spray for this one!

(Photo: Alex Webster, Flickr)

Wallace Falls

Location: Central Cascades/Stevens Pass
Distance: 5.6 miles
Gain: 1300 ft.
Highest Point: 1500 ft.
Difficulty: Moderate
Notes: The Wallace Falls hike is perfect for a daytime picnic outing; there is even a covered picnic area at the bottom falls. Once you pass the picnic area, the hike gets a little bit tougher but the view makes it well worth it! Bring sturdy hiking shoes if you have them and don’t forget your camera!

(Photo: Sean Munson, Flickr)

Mailbox Peak

Location: Snoqualmie Pass/North Bend
Distance: 6.0 miles
Gain: 4000 ft.
Highest Point: 4822 ft.
Difficulty: Difficult
Notes: This very challenging hike is only open from May to November, as it is best when the weather is sunny and dry. With an elevation change of over 1,000 feet per mile, you definitely need to practice if you are not an experienced hiker. But hey, the 360 degree view should be enough motivation!

(Photo: Diana K, Flickr)

Loowit Falls

Location: Mt. St. Helens/South Cascades
Distance: 9.4 miles (full day)
Gain: 800 ft.
Difficulty: Difficult
Notes: This one is amazing for its flora; it’s beautifully covered in moss, wild flowers, and greenery. Tips: start early in the day, bring a headlamp in case it gets dark, and pack some sunblock because there is little shade.

(Photo: 0utdoorsgirl, Flickr)

Hannegan Peak

Location: Mt. Baker
Distance: 10.4 miles (multiple days)
Gain: 3100 ft.
Highest Point: 6200 ft.
Difficulty: Difficult
Notes: This route offers spectacular views right from the beginning with amazing waterfalls and flowers. The bugs are pretty prominent here, so don’t forget your bug spray! Once you get to the top, the views will make you speechless.


So grab your backpack, lace up your shoes, fill up those water bottles, and hit the trails—they’re waiting for you! Want more amazing hikes? UW alum and author Craig Romano, who earned a BA in History and a Master’s in Education, has written several books on hiking, including Backpacking Washington and Day Hiking Olympic Peninsula.

Have a favorite hike not shown here? Tell us about it in the comments!

Art for self-care and mental health


Think of something creative that you enjoy doing. Perhaps it’s dance, painting, or creating music. How do you feel when you are creating art? Some would say calm, happy, relaxed, or inspired. Art has an incredible way of connecting the world and allowing us to express ourselves. Because of these feel-good effects, art is a powerful tool for self-care and mental health.

Studies have shown that expression through art can help people with depression, anxiety, and stress. Art has also been linked to improved memory, reasoning, and resilience in aging adults.

We’re diving into the powerful impact art can have on your life. The best part is, art is something everyone can participate in. It does not prescribe to any particular set of norms and is unique to each and every one of us. So why not give it a try? It may be the best trick for health yet!

Benefits of art for mental health

Stress relief

Stress is proven to be detrimental for our physical and mental health. One of the best ways to combat stress, is to make art! Study after study has shown that drawing, doodling, coloring, and simply creating something for 20 plus minutes reduces cortisol. The best part is that previous art experience is not required to reap these benefits.

Boosts self-esteem

The consistent practice of art can build a sense of accomplishment for all ages in just 45 minutes. Creativity makes us feel good about ourselves. It validates our unique ideas and our ability to turn ideas into something physical. Taking time for your hobbies and crafts often provides a sense of self-worth and confidence in our abilities. So knit that sweater and play that piano!

Healing

Healing from trauma is a complicated process and there are many practices that can help facilitate this process. Research has proved that art can help process pain and provide a direct connection between the mind and body to help with the healing process.

Expressive therapy

Expressive arts, such as visual arts, movement, drama, music, and writing, foster deep personal growth and community development. Expressive art therapy allows users to laugh, let go, and relax, which helps decrease depression, anxiety, and stress.

Ways to practice self-care through art

Use art as a release

A common exercise to utilize art for release is to first represent things you want to let go of as words, drawings, colors, or images on a blank canvas. Then you can burn it, rip it up, cover it up with something new that inspires you, throw it away, put it in water, or destroy it in any way you please.

Respond through art

In the same way that releasing through art can help us overcome difficulties, it can also be used to cope with pain and negative feelings. Some examples include writing to a loved one that hurt you or taking photos of a place that used to hold meaning to you. It is also helpful to find a piece of art you connect with such as music, writing, or a painting, and to then utilize this inspiration to create something of your own as an emotional response. Understanding what you are trying to capture through this piece and breaking down how it makes you feel can be beneficial to this analysis.

Mindful creativity

Art doesn’t require thought, it can be a free-flowing creative process. To practice mindful art, you can simply start creating or choose a piece of art as inspiration for your own creation. Block out the other thoughts and distractions in your life and give yourself a set amount of time to make art or enjoy it.

Collage your thoughts or visions

Some people find it difficult or don’t enjoy the practice of drawing, painting, or writing but there are endless ways to practice art. You can create a collage that expresses what you’re feeling about a specific situation to process your emotions and thoughts. You may also collage a vision board to focus on the future and use photos that excite you. All you need are some magazines, newspapers, or old images around your house.

Color a feeling wheel

Leah Guzman is an art therapist who wrote a book on further practices in essential art therapy, and an exercise she champions is to develop a color feeling wheel to deal with emotions. It starts by drawing a circle then dividing it into eighths and writing one emotion in each section, then pick a color that represents that feeling and color the section in. Afterwards, pay attention to which emotions were associated with which colors, the feelings you wrote first, and how this is applicable to your everyday life.

Other practices of art

The benefits of art are extended across any medium that excites you. Consider trying different forms of art and tapping into your creative mind along the way. Here’s a list of other popular art forms to explore:

  • Doodling or scribbling
  • Coloring
  • Writing
  • Photography
  • Sculpting
  • Playing an instrument
  • Dancing
  • Fashion
  • Needlework crafts
  • Jewelry making

Are you an artist or creative? Share with us in the comments below what creative art forms bring you peace and joy!

Budget friendly vacation ideas in Washington State

This article was provided by our partners at BECU.

If you live in Washington and want to enjoy a break without breaking the bank, consider taking a summer vacation a little closer to home. Here are some ideas from our partners at BECU to help you save while exploring your own backyard.

While scrolling through Instagram pictures of tropical resorts, luxury lake homes and international excursions, you might think everyone is taking high-dollar vacations this summer.

But the prospect of spending thousands of dollars on a summertime getaway can be disheartening if you’re trying to save money and pay off debt. Even though travel costs have decreased since last year, airfare, hotel and care rentals can add up.

The good news is, if you live in Washington, you’re surrounded by great opportunities to explore and have fun. Here are some ideas to help you control costs in four main vacation spending categories: entertainment and activities, food, lodging and transportation.

Entertainment and Activities

One way to control costs on your vacation is by being selective about your entertainment choices. Here are some ideas.
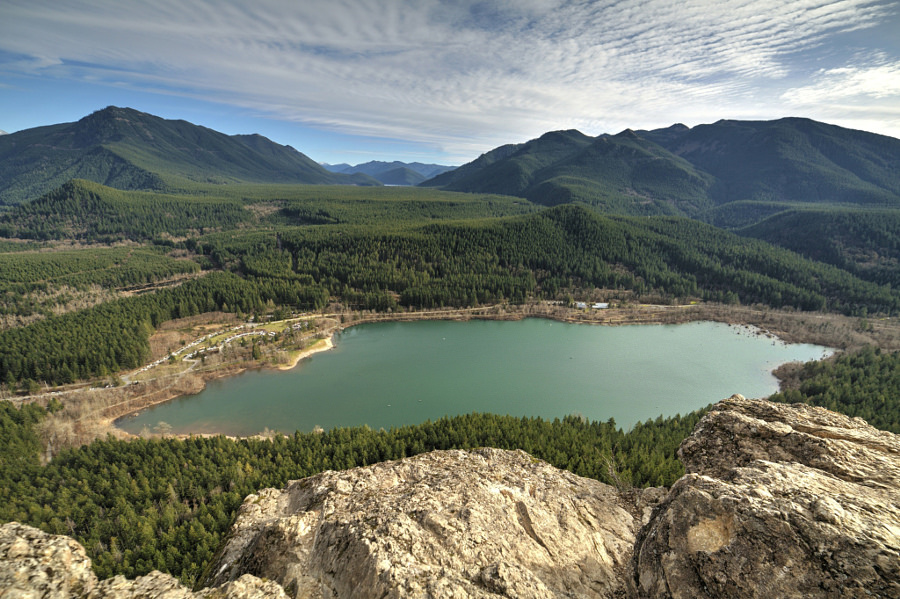
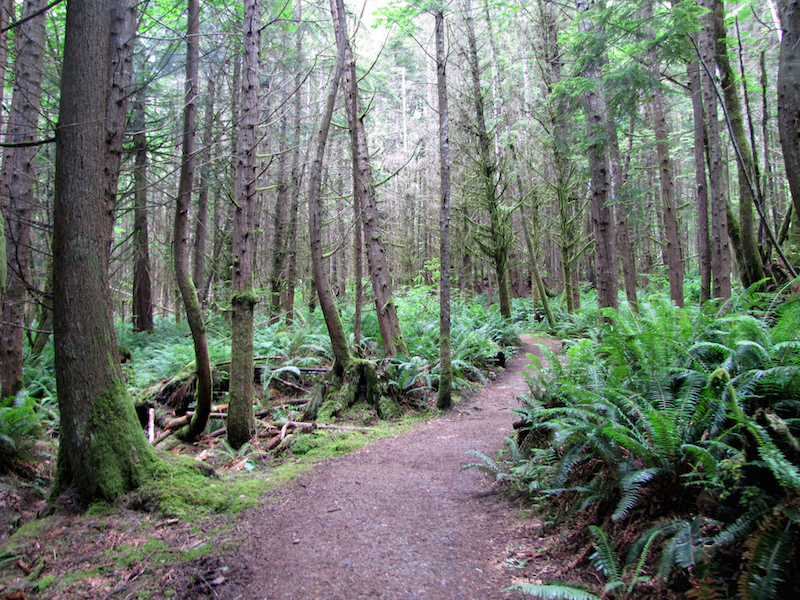
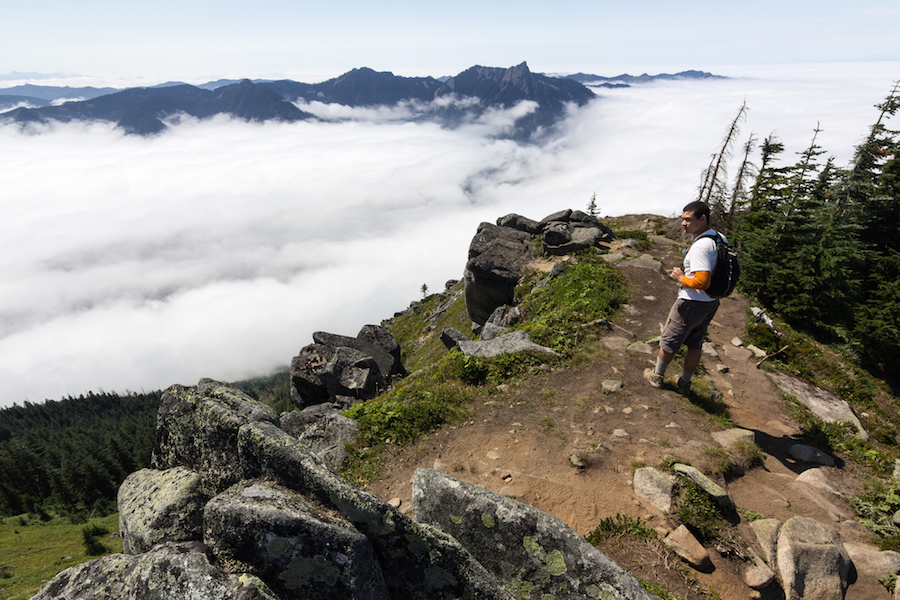
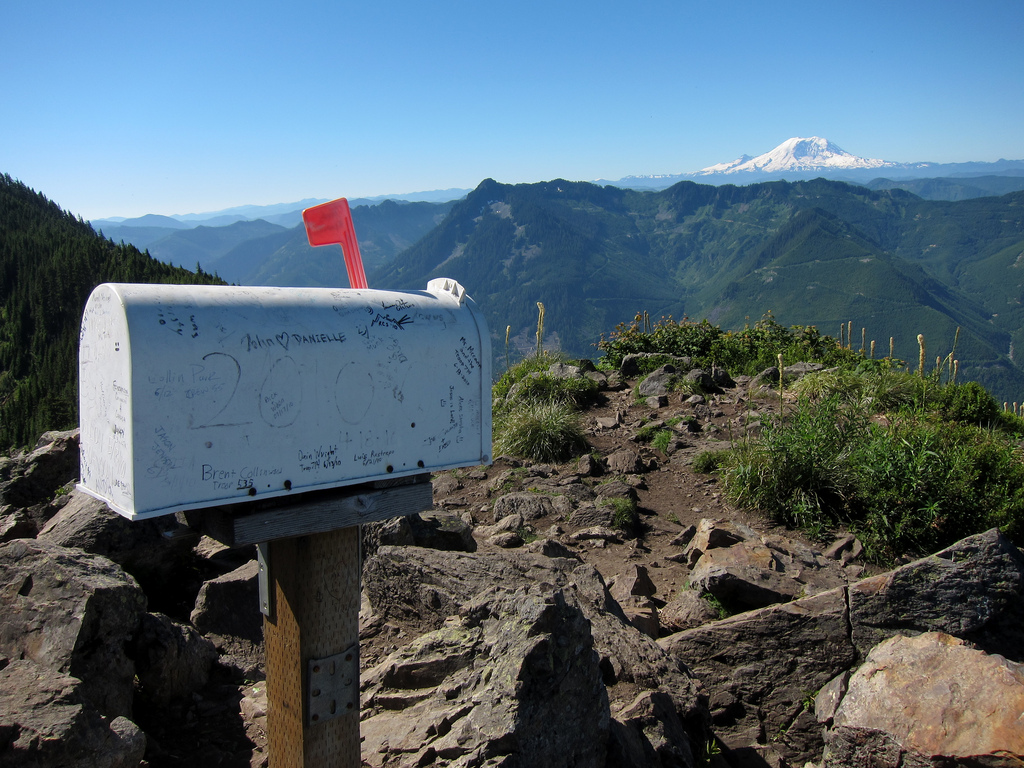
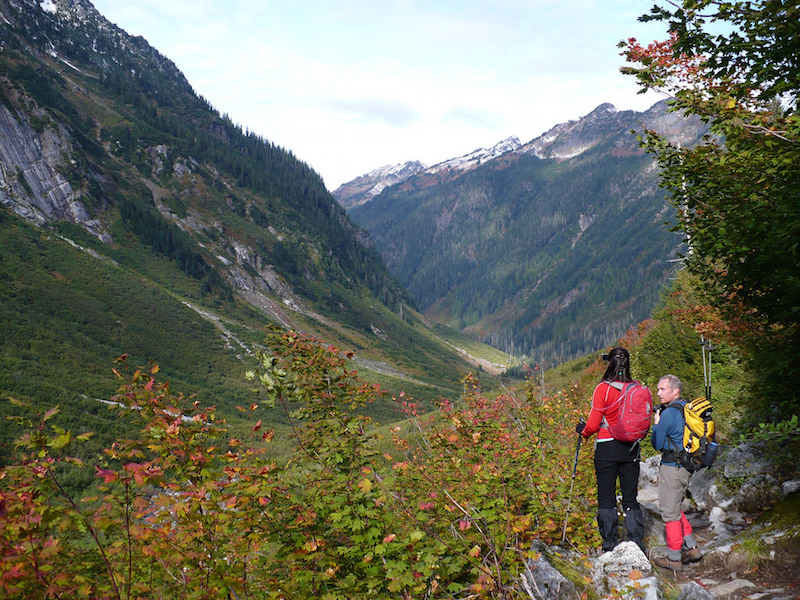
Go Hiking

Enjoy trails ranging from easy to expert in Washington’s diverse geography. Trail access is typically free, but you may need to pay for parking and park entrance fees. Some trails in backcountry and wilderness areas require paid permits, and access may be limited through a permit lottery. Check the requirements before you get to the trailhead. If you’re new to hiking, learn how to stay safe before you go.

Washington offers thousands of hiking trails for any activity, skill level or season.

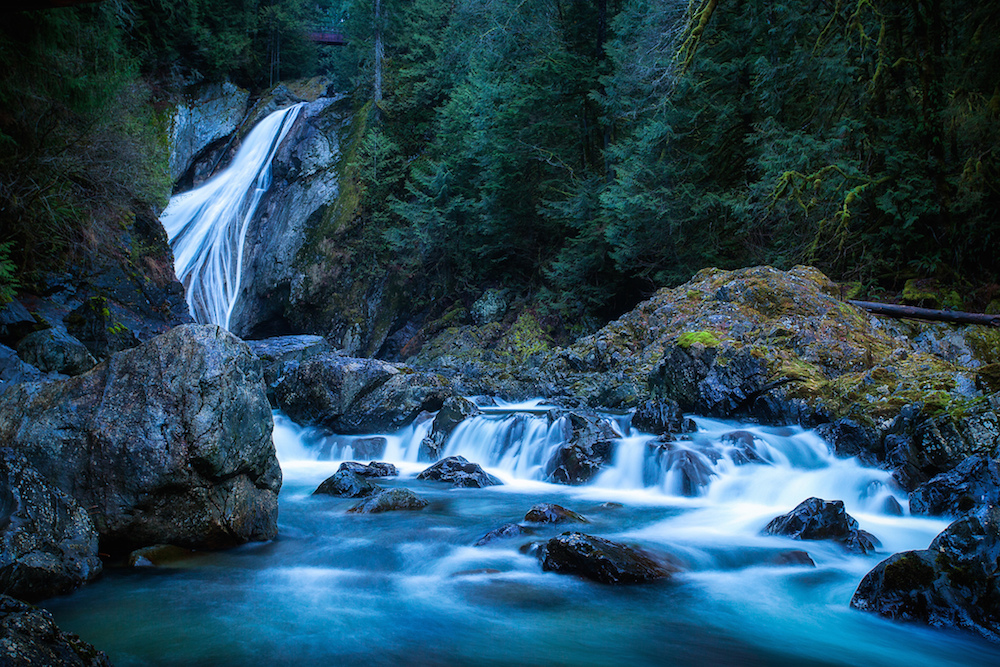
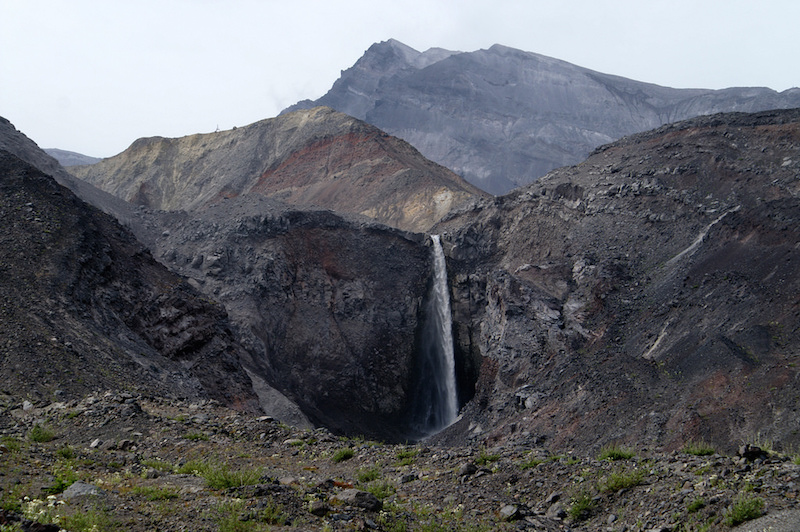
Visit Snoqualmie Falls

If you like waterfalls, this stop is for you. Plus, it’s free and viewing areas are ADA accessible. According to the Snoqualmie website the falls are more than twice as tall as Niagara Falls and the second-most visited natural landmark in Washington after Mount Rainier. After you visit the falls, you can head into town for local ice cream at Snoqualmie Ice Cream (temporarily located at 8125 Falls Ave.), or local beer at Snoqualmie Falls Brewery.

A visit to Snoqualmie Falls is free. You can choose an easy stroll to the top viewpoint, or, if you have more energy, take the trail to the bottom and back.

Play at the Beach

With more than 3,000 miles of outer coastline, Washington provides lots of opportunities to play at the beach. You could try surfing at Westport, exploring tide pools at Rialto Beach or clamming at Illahee State Park. (Clamming requires a license from the Washington Department of Fish and Wildlife, and you’ll need to check the health status of beaches with the Washington Department of Health.)

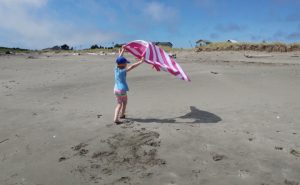
Enjoy beaches along the Pacific Ocean, Puget Sound, lakes and rivers across Washington

Visit a Lighthouse

With so much coastline, Washington also is a lighthouse fan’s dream with 30 lighthouse sites. One example: View the Cape Flattery Lighthouse from the rugged northwestern-most point of the lower 48 states. Be sure to stop at the Makah Indian Reservation to buy a recreation permit before you go, or buy and print a permit from the Makah website.

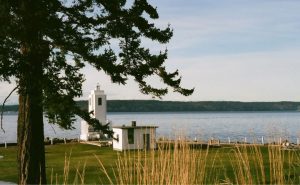
Lighthouses dot Washington’s shorelines. Some still have active lenses and you can go inside some for tours.

Go for a Scenic Drive

If you’re looking for a great view and have gas money as part of your vacation budget, Washington has some spectacular options. Here are a few favorites:

Mount Baker Highway, or Highway 542, winds east from Bellingham through Whatcom County, ending at an elevation of 5,140 at Artist Point, with stunning views of Mt. Baker and Mt. Shuksan. If you’re coming from the south, consider taking Chuckanut Drive to Bellingham.

Olympic Peninsula Loop on U.S. Highway 101 is a 300-mile route around the perimeter of Olympic National Park. Drive the whole loop or pick sections to see rainforests, Pacific Ocean beaches and lakes. Highway 101 is also the road to Forks, made famous by the “Twilight” movie series.

Highway 14 along the Columbia River Gorge is the Washington counterpart to the popular I-84 route on the Oregon side of the gorge. You’ll be treated to views of the Columbia River and Mount Hood, see the top windsurfing spots in the world, and you can visit a Stonehenge replica, built as a World War I memorial, at Maryhill.

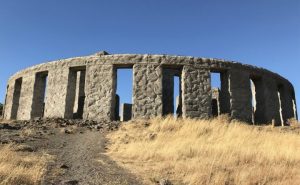
A Stonehenge replica, built as a World War I memorial, is one of the scenic stops along Highway 14.

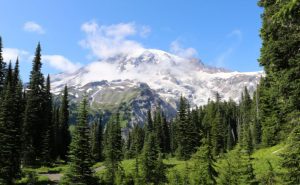
Take a drive to Paradise in Mt. Rainier National Park for breathtaking views.

Tour a Bunker

During World War II, military forts were built along the Strait of Juan de Fuca to defend Puget Sound. You can visit many of these sites, whether you’re interested in learning some history, or you like the spooky factor of walking around old bunkers.

Many locations require a Discover Pass or other paid parking permit. Here are some of the bunkers you can visit:

  • Camp Hayden in Port Angeles.
  • Fort Worden in Port Townsend.
  • Fort Casey on Whidbey Island.
  • Fort Ebey on Whidbey Island.
  • Fort Flagler on Marrowstone Island.
  • Fort Ward on Bainbridge Island.

Food

Whether you stay in a hotel, camp in a tent or crash with friends, meals can be one of the most expensive parts of any travel plan. Here are some ideas to control food costs:

Make Your Own Meals

If you pack your groceries (or buy them when you get to your destination) and limit yourself to one restaurant meal per day, you can reduce your food expenses and treat yourself to some truly delicious dining experiences.

Pack Your Meal as Part of the Fun

Pack your meals to make eating part of your outdoor experience. Whether you’re hiking, road-tripping, beachcombing or visiting a park, plan to enjoy your surroundings while you take in a meal. Bonus: You don’t have to take a break from your activity to go find a restaurant.
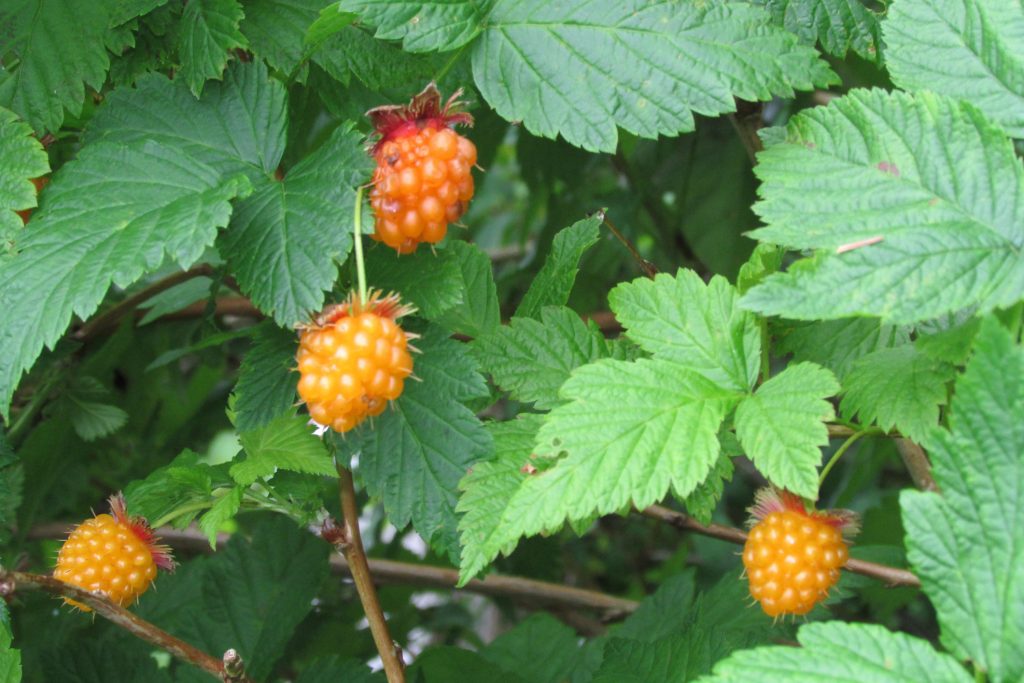
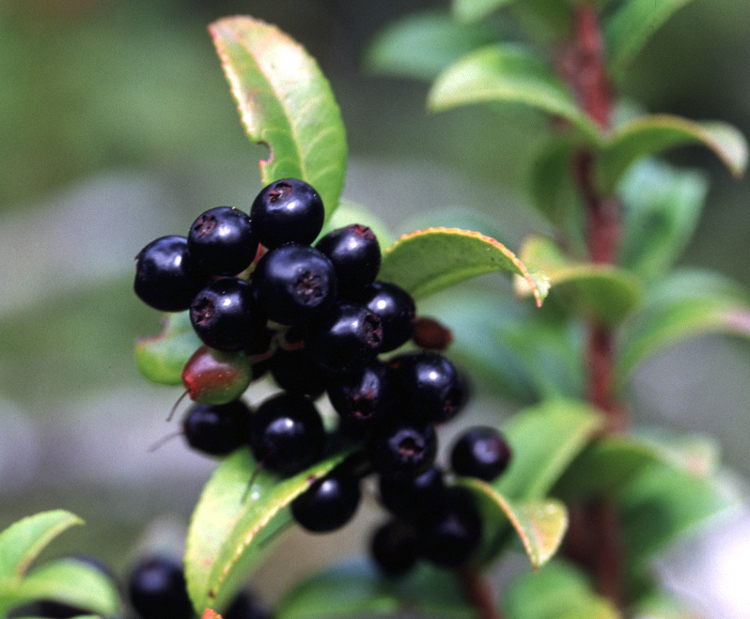
Prepare Local Food

The diversity of Washington’s geography supports a wide variety of food. Here are a few suggestions for places to pick up local food that you can take back to your kitchen and prepare:

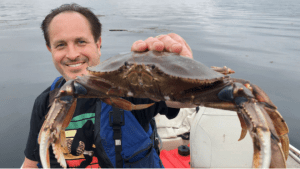
Crabbing in the Puget Sound makes the perfect meal for seafood lovers. Licenses are required for this activity.

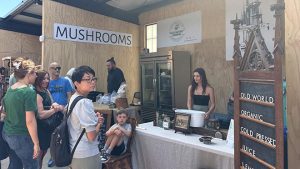
Shop at local farmers markets for the fresh produce and regional specialties.

Lodging

Lodging can be another big chunk of vacation expenses.

Staying with friends and family can be fun — and economical. If you take your friends out for a meal or two to repay their kindness, you’ll still spend less than the cost of a hotel stay.

But what if you don’t know anyone who lives in your vacation destination or just prefer not to stay with friends? Here are a few money-saving options.

Go Camping

Washington is home to beautiful camping options, offering an array of mountain, rainforest, desert, beach, lake and river locations.

If you’re a new camper and starting from scratch, getting geared up can be an investment. You’ll want to build savings goals into your budget for purchases like a tent, sleeping bag, sleeping pad, stove and cooler. But once you have your setup, you’ll have plenty of options for low-cost accommodations.

Camping can be a low-cost lodging option that gives you a chance to connect with nature and unplug.

Here are some examples:

Washington State Parks campsites cost $12 for a primitive campsite, up to $56 for a full-utility campsite.

National Parks campsites costs vary by park and by campsiteOlympic National Park, for example, costs $15 to $24 for a campground spot. Some National Parks also have entrance fees. For example, Olympic National Park charges $30 for a standard non-commercial vehicle with up to 15 passengers.

Washington Department of Natural Resources manages 80 campgrounds in the state. Campsites are free, but they are first come, first served, and you do need to have a Discover Pass.

If you’re not quite ready for tent camping, you can spend a little more for a “glamping” experience in a yurt or cabin, but be aware: Some cabin rentals can rival the cost of a hotel stay.

Sort by Hotel Price

If you don’t already have your heart set on a destination and you just want to get away for a few days, consider choosing your vacation spot based on the price of lodging.

Go to a hotel or vacation rental website, enter your vacation dates and sort by price. For example, a search on Booking.com for three-star accommodations in Washington for a week in July, flexible dates and two adults returned 1,217 properties. The lowest price was $310 for a hotel in Yakima, including breakfast — so maybe a winery tour is in your future.

Transportation

Transportation costs — including flights, rental cars, gas and ride services — can add up.

Even though airfare is the lowest it’s been in three years, according to Hopper, you can cut out a big chunk of your vacation expenses by finding fun and relaxation closer to home.

U.S. domestic flights still average $265 per round trip, and international travel prices are much higher.

Here are some transportation suggestions to get you to your local vacation spot and enjoy the sights once you’ve reached your destination.

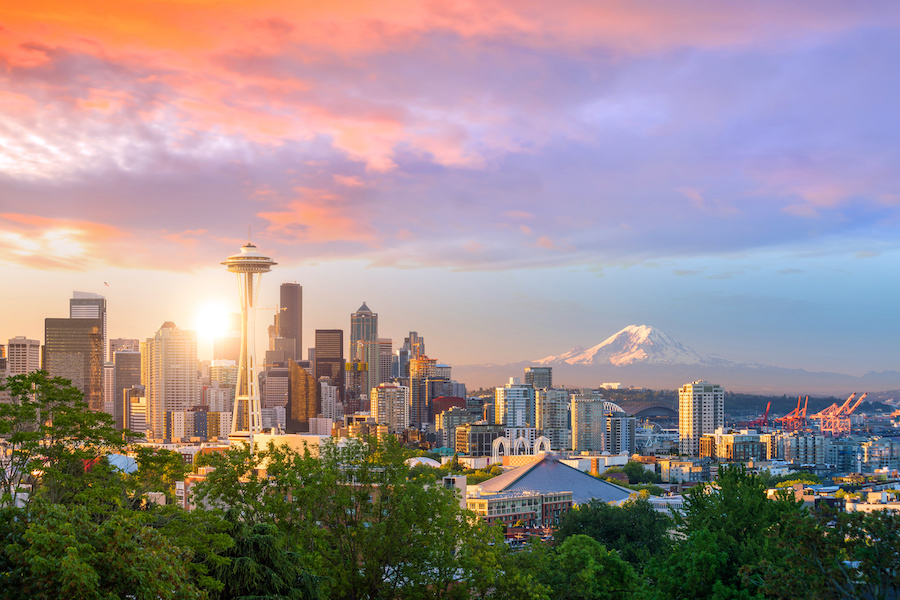
Take Local Public Transit

Many Washington cities and counties offer bus services and other types of public transportation.

King County Metro is the largest local public transportation agency in the region, serving Seattle and all the surrounding cities and unincorporated areas of King County. An adult single-ride fare is $2.75 and a regional day pass is up to $6.

You can even take the bus to popular hikes along I-90 near North Bend using Metro’s Trailhead Direct service. No gas or parking money required.

Other fun and affordable public transit options include Seattle’s South Lake Union Streetcar and Seattle Center Monorail and Sound Transit’s Link light rail.

Ride the Ferry

In addition to being a great option for getting you to and from a destination, ferries can be an affordable alternative to water tours and cruises.

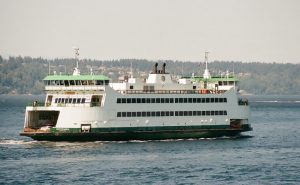
Riding a ferry can be an affordable way to get your vacation destination or just get out on the water.

Washington State Ferries are a division of the Washington State Department of Transportation and an extension of the state highway system. Ferry routes (PDF) connect passengers to locations throughout the Puget Sound and the San Juan Islands.

Prices vary, but as an example, from Seattle, an adult can walk on the ferry to Bainbridge Island for $10.25. The ride back to the city is free. If you decide to drive on the ferry with an adult passenger and two kids under the age of 18, you’ll pay $33.45. That’s a pretty good deal, considering you aren’t paying for airfare.

If you’re planning to travel to Port Townsend or the San Juan Islands, you can save yourself a long wait during busy travel times by making a reservation.

Find Activity-Based Transportation

If your vacation involves a specific activity, like hiking, mountain biking, wine tasting or brewery tours, check if shuttle services are available.

Here are some examples:

Little Hopper provides shuttle service for craft brewery and winery tours in Yakima Valley.

Visit Walla Walla’s website has a list of wine tours and transportation options.

Olympic Hiking Co. Trailhead Shuttle offers transportation to backpackers who want to leave a car at one end of their point-to-point trip through Olympic National Park.

Talking Rocks Outdoor Company, based in Enumclaw, specializes in trailhead shuttle service to the South Cascades.

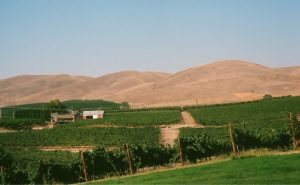
Enjoy a winery tour and explore vineyards in Washington.

While on vacation, sip and learn the history of popular Washington wines.

Resources

Figuring out where to go and what to do can be overwhelming. Here are a few suggestions to get you started:

Local newspaper entertainment guides: The Seattle Times, for example, has an event and entertainment guide called “The Ticket,” and The Stranger has “EverOut.”

Tourism bureaus and organizations: State of Washington TourismVisit SeattleVisit Spokane and Yakima Valley Tourism are examples.

Bargain-based listings: Greater Seattle on the Cheap has a whole website dedicated to low-cost fun.

Your local library: Public libraries are great places to find free entertainment, festivals, classes, art and history.


This article was written by Katie J. Skipper, BECU Community Content Manager. Katie manages the BECU Blog and writes about personal finance topics including credit cards, budgeting, debt management, loans, taxes, home improvement, inflation, fraud and scams. She also writes about race, gender and social equity, and features the stories and expertise of BECU employees and community members. A former journalist, she has reported for daily newspapers in Washington and Montana, including The Daily (Everett) HeraldGreat Falls (Montana) Tribune and The Bellingham Herald, covering a range of topics including government, law and justice, and the environment.

Thank you to BECU for sponsoring The Whole U!